Using the Configure Table Icon
How to use the configure table icon?
- On the home page, from the Admin panel on the top, select Taxonomy.
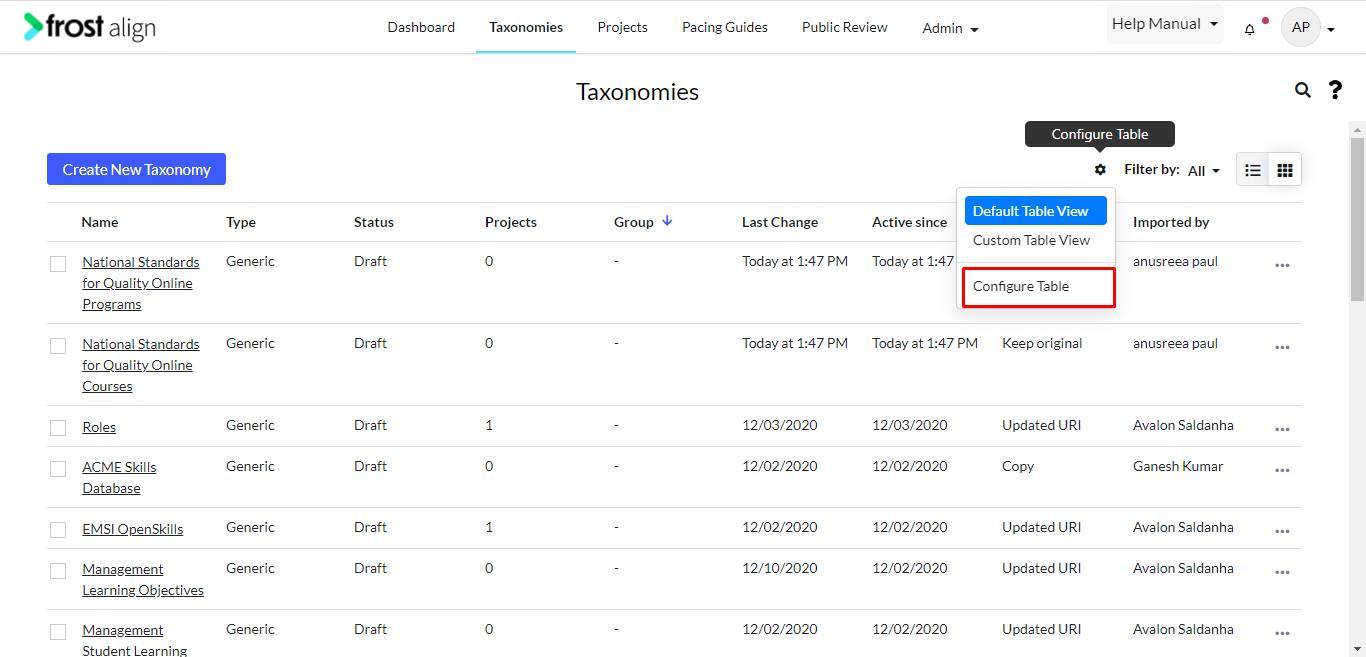
- To configure users’ own table based on the metadata fields, select the Configure Table icon.
Note: You can add columns and set the table as default table configuration. Users with admin rights can set Configured Table from the list as default for all users.
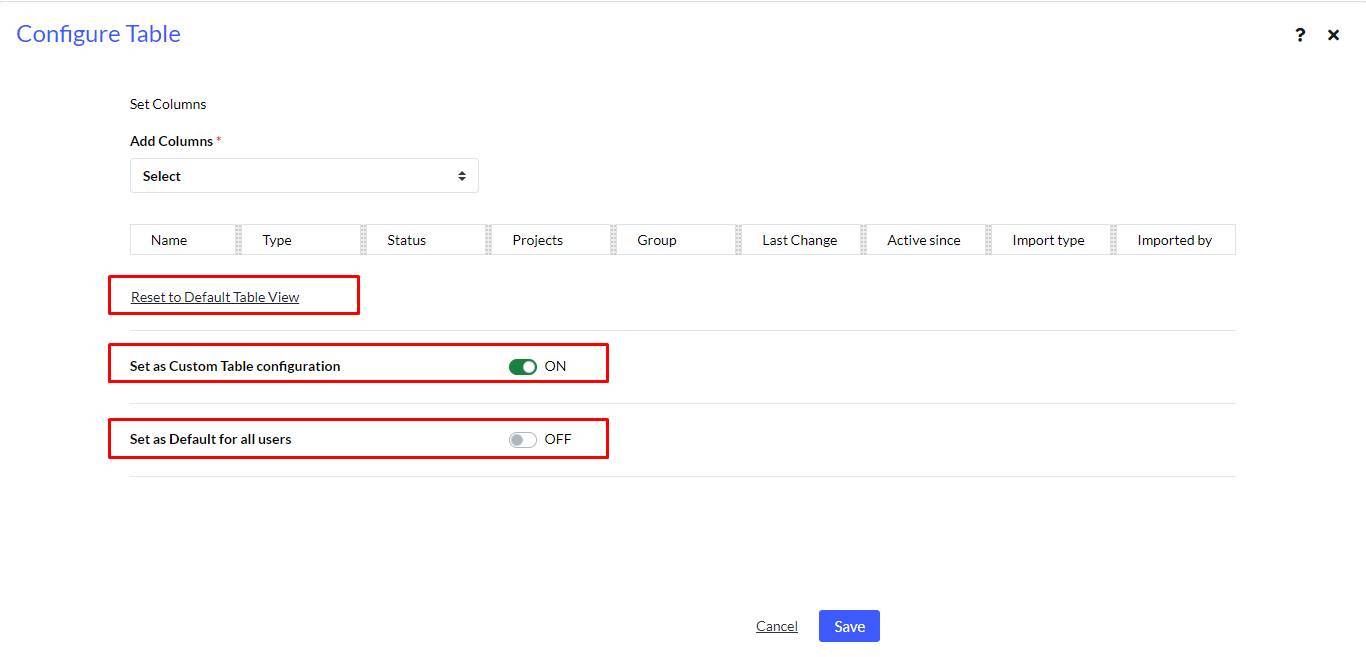
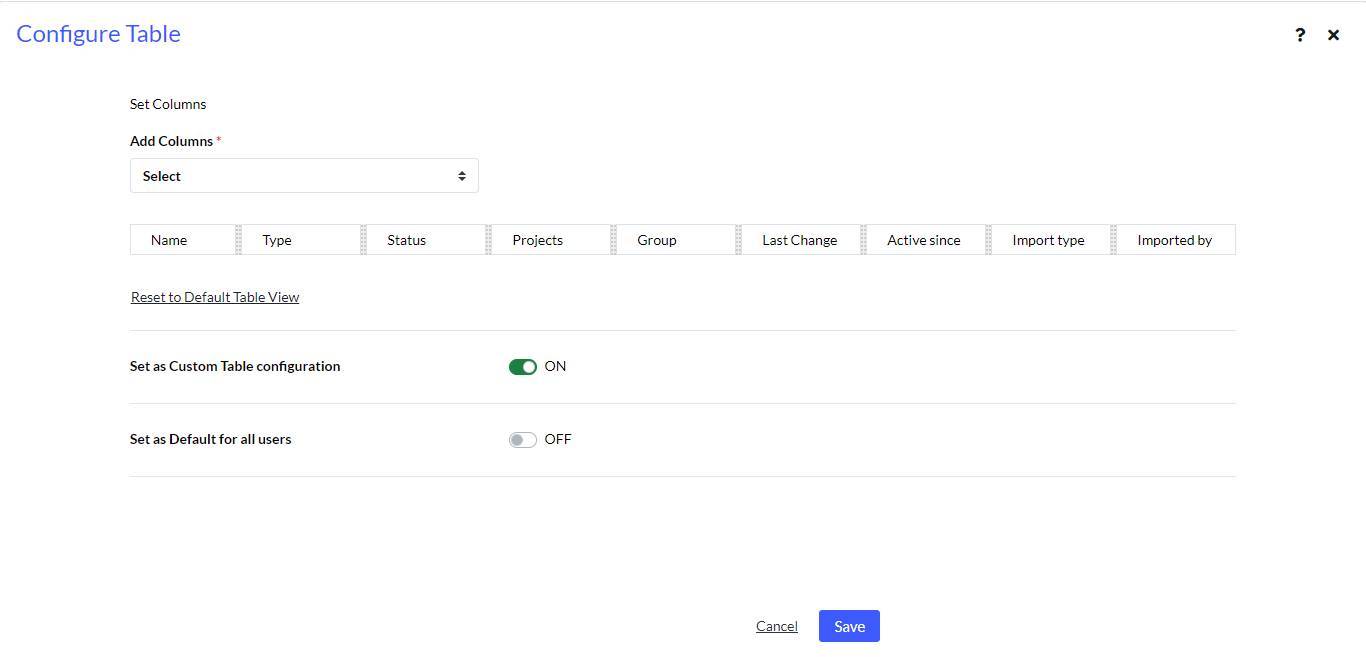
- The Configure Table pop-up page appears. Notice all the columns as seen in the listings page.
Note: The maximum limit of columns addition is 10.
- Users can either delete the columns by clicking the x icon located with each column title.
- To add a new column, select from Add Columns *.
Note: Only the titles already not added will be allowed. The added column gets highlighted for fractions of seconds for easier comprehension.
- Users can resize each column using the resize icon.
- Users can change the order of the column titles as per their requirement.
Note:
- The column titles cannot be edited.
- Default columns cannot be edited.
- To save the changes, click Save. Saved successfully. message appears.
- Users can choose from Default Table View or Custom Table View.
Note: The default view doesn’t display notes which are configured columns.